
The Coop-Dominium (Part 3)
The Chicken Run
This post describes the continued efforts of building the Homestead Chicken Coop. Otherwise known as the “Coop-Dominium”. It is the third part of the multi-part series – This one focusing on the Chicken Run – The construction, and lessons learned along the way.
Size and Dimensions
I think the hardest decision was how large to make the run. I was thinking my flock would be small – perhaps 6 hens to start with. I want to have the option to grow the flock in the future.
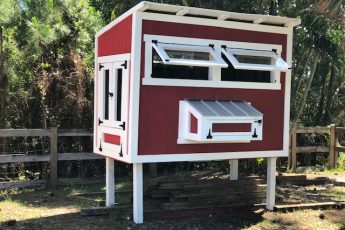
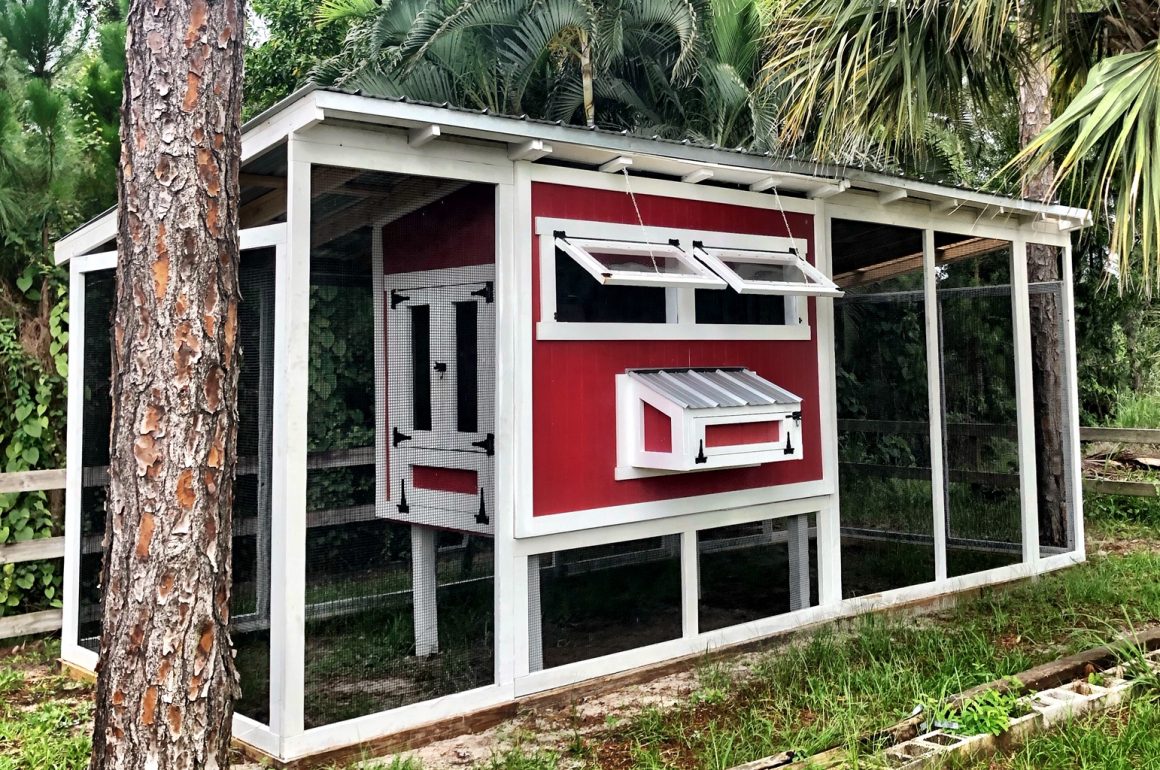
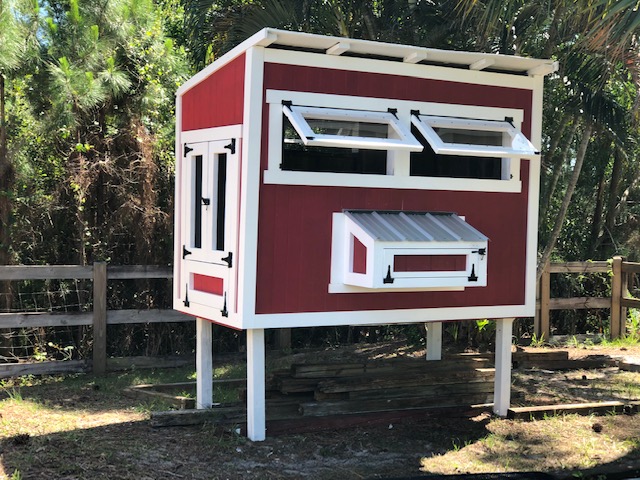
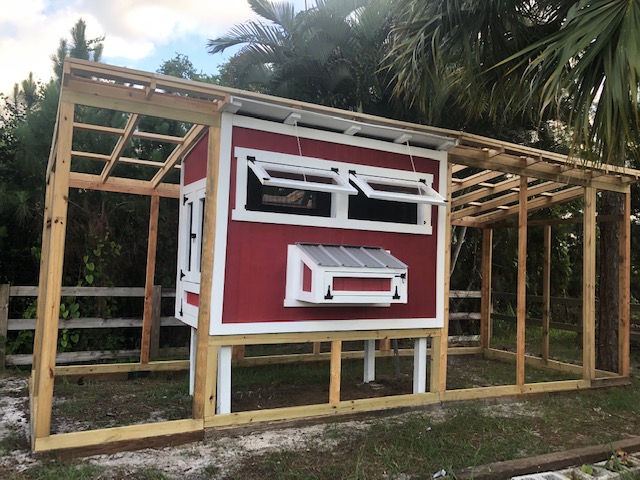
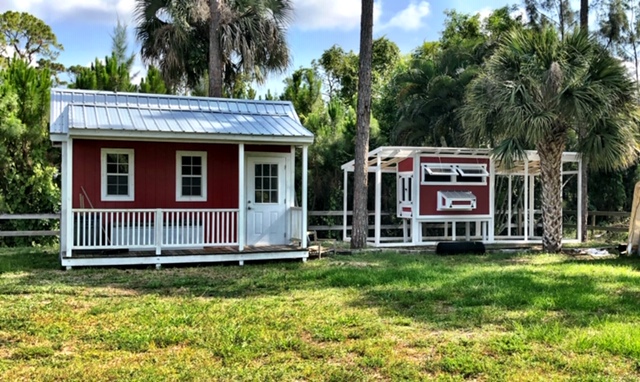
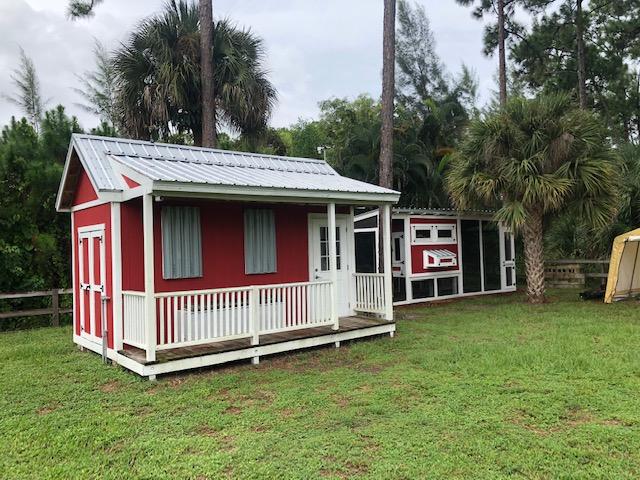
As described in the previous posts, the coop itself was built and painted. It is 8 feet wide, 4 feet deep, has a nesting box with three large areas in the front. It has plenty of windows so there is ample amounts of ventilation, and has a deep liter box with access from the side.
It is well known that the rule of thumb for chicken-to-coop ratio is about 2 to 3 square feet per hen inside, and 8 to 10 square feet per chicken in an outside run. Of course, the more square footage the better.
I know that skimping on space requirements for a flock of chickens can cause stress, cannibalism, pecking, and sometimes even death.
I tend to over-engineer everything and have lots of room to build on the homestead. Therefore, I built everything to be exactly 2 times what was needed. Conservative calculations for this coop (32 sq feet) dictates that it can easily support over a dozen.
The run is 10 feet wide x 24 feet long – 240 square feet. I calculated that a total run size of 240 square feet would be required to accommodate a dozen healthy productive hens. Especially as I will also free range in the future.
This gives me plenty of opportunity to grow the flock when the time comes.
The Materials
Again, as stated in previous posts, the coop itself was made of almost 100% recycled wood. I used some disassembled giant pallets and some other craigslist finds. Other than the 4×4 legs which the coop sits on which are made from old fence posts, None of the coop itself has “pressure treated” wood. Of course, the exterior was painted to protect it (and to make it look good). I used good quality exterior grade primer and paint. I don’t want it to peel or chip and don’t want the chicks to get into any harmful materials.
Knowing that I’d be building a good sized run, I spent a few months collecting materials on craigslist for this purpose. The first find was a load of yellow-pine 2×2’s and 2×4’s from a contractor who over purchased for his own project. That find alone saved me a ton of cash – close to 75% from purchasing wood retail. I picked up enough wood in this single find to build the complete run including the roof rafters. I also had lots of left over 4×4 fence posts which blew over in a previous hurricane, so I decided to use those as the base of the run walls.
For the hardware cloth, I decided not to skimp. This was by far the most expensive part of the build. Yes, it was not cheap, but I decided on high quality, strong, and long lasting cloth. Predators are a big concern for anyone having an enclosed run – and in South Florida, we have everything from giant iguanas, to raccoons, to mosquitoes which can carry away small dogs. After going to several stores (Tractor Supply, Local Feed shops, and looking online), I decided to go with Amazon. The wire I purchased was a 100 foot long by 4 foot wide roll of 1/2″ x 1/2″ square 16 gauge black vinyl coated wire.
The Panels and Framing
The run is made up completely of panels screwed and glued together. Based on the fact that I had 4′ wide hardware cloth, the decision was easy on how large to make each panel. The run has a front and back. The front face of the coop is exactly the same height as the walls (8 feet high), and the back walls are 7’6 inches high. This difference will allow the roof to be slanted and angled properly for drainage and to allow me to put in gutters to catch the rain water. Each is just shy of 4 feet wide (3′ 8″), by either 8 feet tall or 7’6″ tall (the length of the 2×4’s with minimal waste). Leaving a 2 inch overlap to staple the wire cloth to the panels. The sides were kept at 7’6″ high allowing me to add predator protection to the sides at an angle.
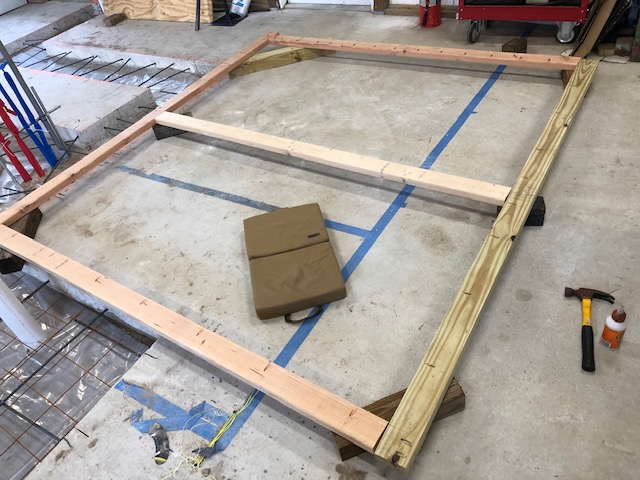
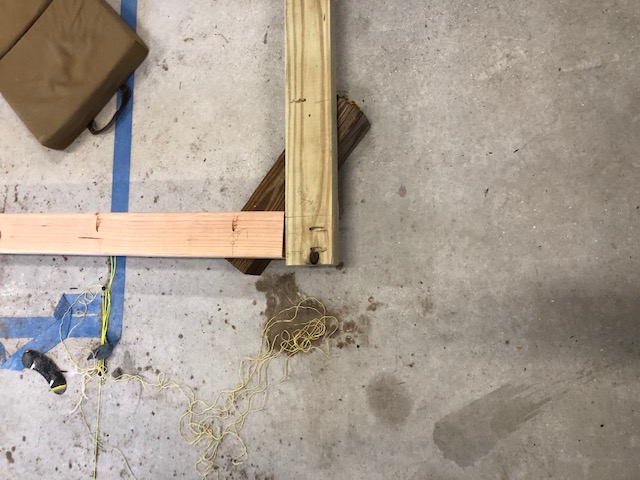
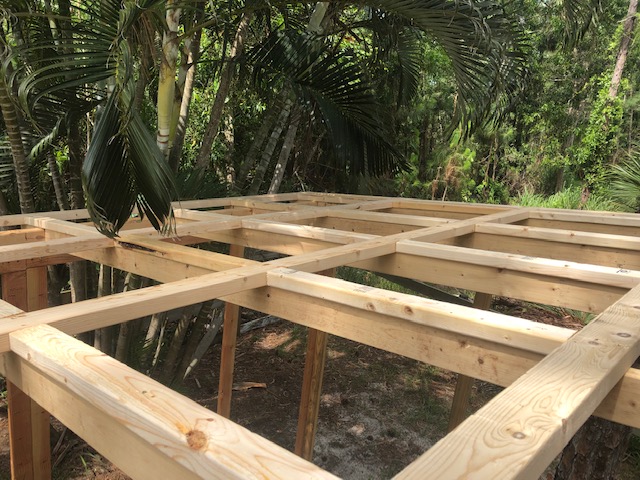
Before building the panels, I cut 4×4 fence posts and placed them on the ground. It took a fair amount of time and was a little tricky to level everything. I took my time to make sure that the 4×4’s were square and level. Each 4×4 is buried about 2 inches below the surface and screwed together. I realized early that it was very important to get the base set up properly as the panels screw down into the 4×4’s and the 2 foot wide predator protection fencing (discussed in another post) is also stapled directly to the posts and buried. This base has to be perfectly square. If not, the walls and roofing would not go together properly.
First I cut all the 2×4’s to length. Then I assembled the individual panels. I decided to join the panels along the thin side of the 2×4 – leaving more room to staple the hardware cloth. They were put together using my Kreg Jig, glue and screws. These panels are very strong.

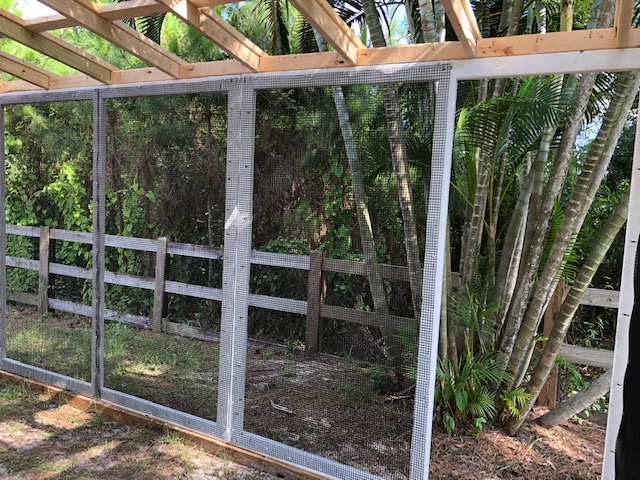
I took my time to build the panels. I built each of them on the flat surface of my garage on the cement slab. This allowed me to make sure each was properly sized and perfectly square. I let them sit overnight to make sure the glue was completely cured. Then the next day, I brought each of them from the garage to the run’s location. First, I attached a panel to the existing coop, making sure it was square and plumb. Then I attached the next panel, and so on. As the 4×4’s on the ground were already square, it was easy to do this. I took the time to make sure each panel was securely glued and screwed to each other and to the base.
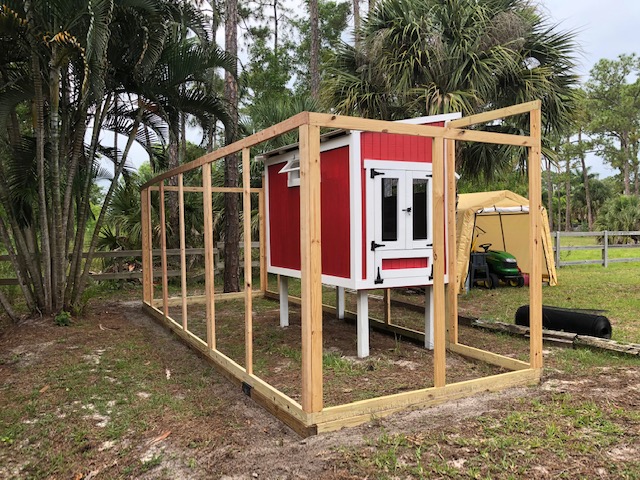
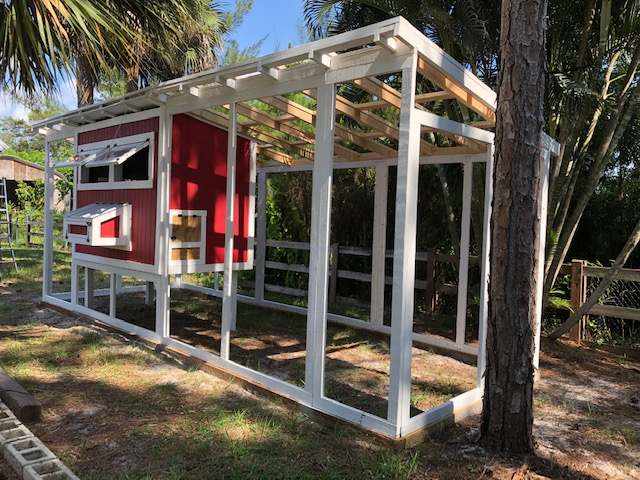
The run panels securely screwed and glued to each other and to the base 4×4’s
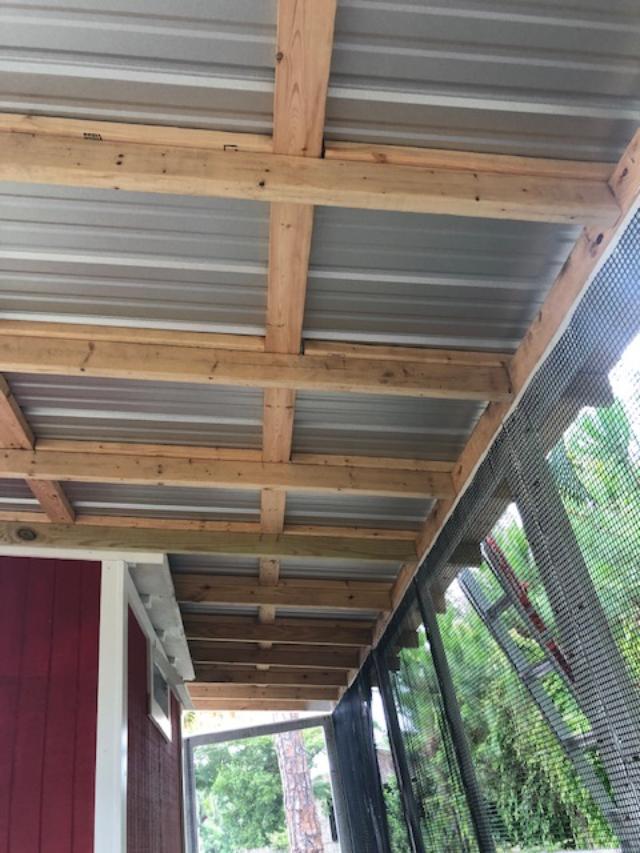
The Roof Framing
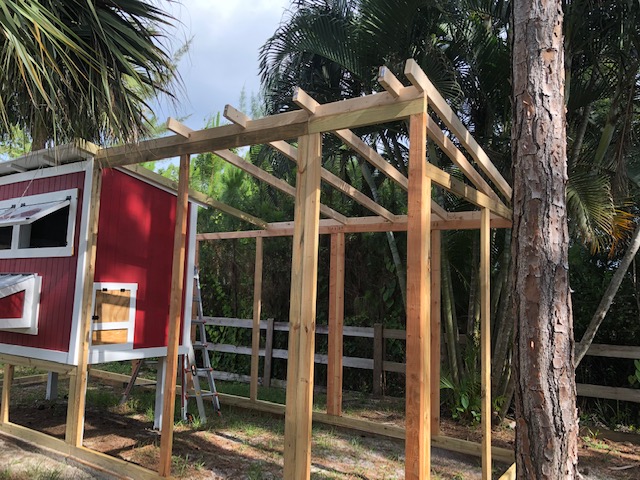
I have to admit that I am not a roofer. I took a bit of time to plan the roof prior to assembly and watched a lot of you tube videos. I wanted to minimize waste and use the remaining material I already had. Unfortunately, I had to purchase a bunch of new 10 foot 2×4’s to use as the rafters. I also needed to purchase the roof panels.
This is a simple metal roof, exactly the same as what is on my house and the shed. The roofing panels were purchased from a friend of mine (wholesale) who owns a roofing company – this saved me a bunch of money too.
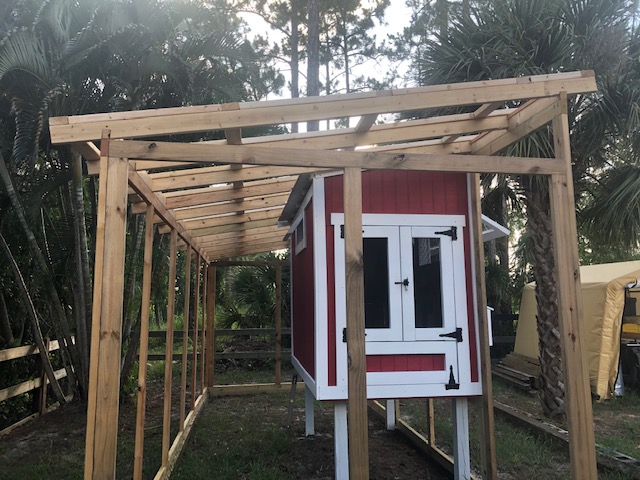
The length of the run is exactly 24′. With the pitch angled as shown above. It has 10 foot long roof panels and rafters to go beneath them. There is a 5″ overhang on the front and back, and there is a gutter on the back. There was no cutting of the panels making it easy to install.
The rain water is collected and drains into a 60 gallon rain barrel. The automatic rain collection and chicken watering system will be another post.
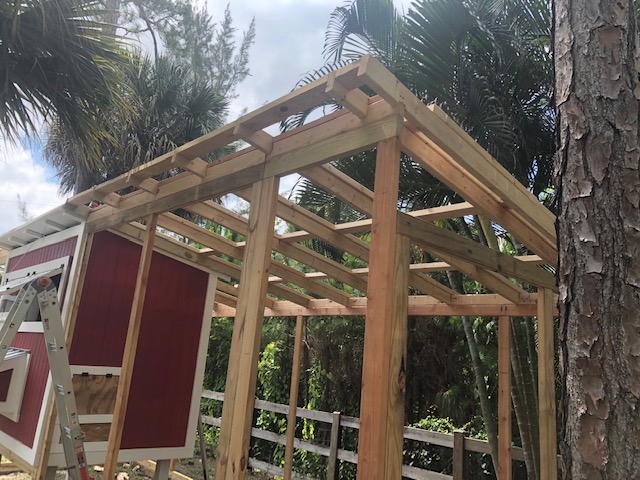
First I cut a bunch of 2×2 strips 23′ 10″ long. Then I nailed each of them them to the top sill-plate with a 1 1/2″ gap between each of them. Then I took each 10′ 2×4 and notched where they will sit between each of the 2×2’s. This would allow me to place the rafters onto the roof and they will just slip into place – like tongue/groove puzzle. Once the 2×4’s were in place, I screwed everything together. It sounds tricky, but as you can see in the photo, this is pretty simple but took some planning.
Then, once all those were in place, I nailed a 2×4 flat across the whole length (3 x 8 footers). I cut a bunch of 2×4’s at 3′ 10″‘s long and nailed them to the top of the rafters. Then I put another row of horizontal 2×4’s down, and did the same to create a flat set of nailers for the metal roof.
Painting
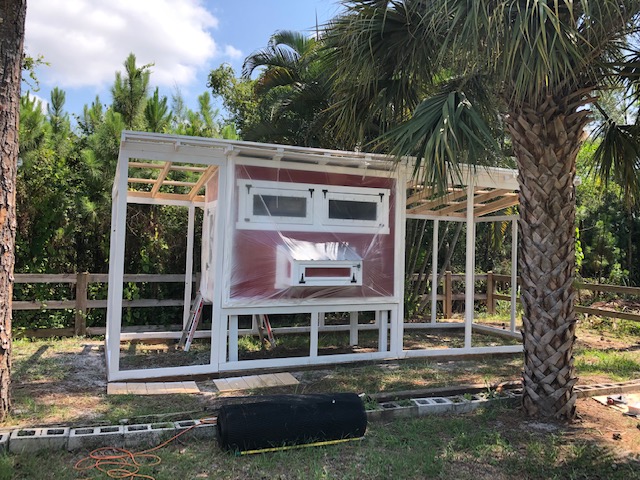
Once all the blocking was completed, I decided to paint the walls. The wire cloth is black and the coop walls are white. This was before the roofing and hardware cloth was installed. I own a paint sprayer, so I blew on commercial grade white primer. I put plastic wrapping on the coop itself, and tarps on the ground so not to get over-spray everywhere. Additionally, as this is a completely covered structure, I decided not to spray the roof rafters as it will be protected from the elements. The main reason not to spray up in the air was that I really wanted to minimize over spray (and save paint).
The Hardware Cloth
As stated earlier, I decided to purchase the hardware cloth from Amazon. I am using thick 16 gauge wire which is a pain to cut. To cut, I used a cheap angle grinder I picked up from Harbor Freight. https://www.harborfreight.com/4-12-in-43-amp-angle-grinder-69645.html
This tool allowed me to zip through the wire with minimal amounts of effort. The hardest part was to unroll the cloth and measure correctly. I measured several times and cut once – this is expensive stuff and would hurt if I cut it wrong.
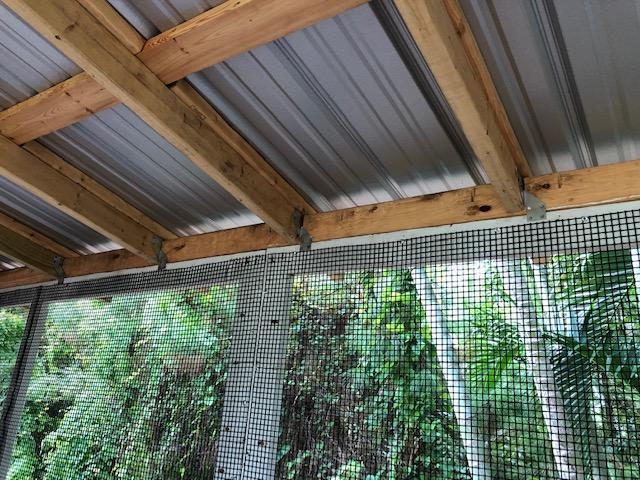
Once cut, I stapled the cloth to the 2×4’s on the inside of the run. I used an air powered pneumatic stapler with 18 gauge 3/4″ long galvanized staples. I stapled the crap out of it. Probably over did it, but that is ok. I placed staples every three inches apart. This is a very safe run – I want to keep the predators out! Also purchased at Harbor Freight Tools, this is a must have and I found it to work perfectly for very little money. https://www.harborfreight.com/air-tools-compressors/air-nailers-staplers/18-gauge-2-in-1-air-nailerstapler-68019.html
The Metal Roofing
The next weekend I installed the metal roofing. As I said, I’m not a roofer, but I’ve installed metal roofing before, so this was pretty easy for me. I won’t go into the gory details, but as this is Florida, there are a lot of things to consider. First, the screws need to be every 6 inches, top, bottom and along each of the rafters. Then, on the inside, I installed hurricane straps. I installed flashing on the front prior to installing the panels.
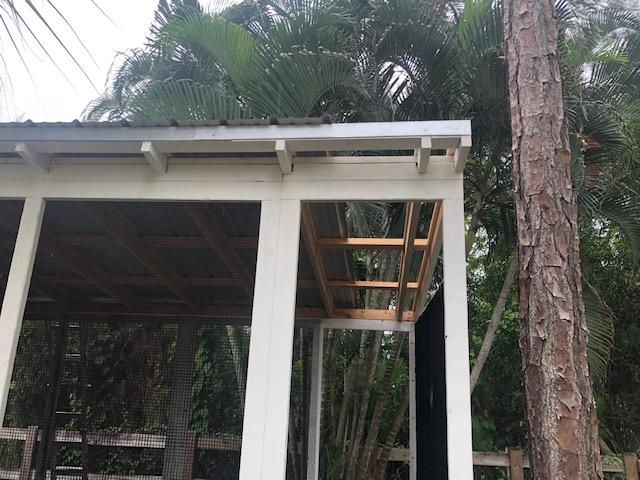
The first thing I did was nail up a flashing/drip edge on the front – this would help with managing the elements and keep structural rigidity. See image above.
The Dutch Doors
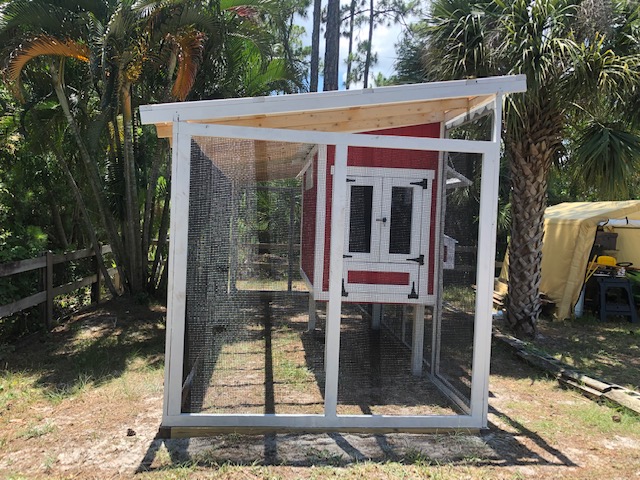
I decided to build a set of doors for the coop which could open at the top and the bottom. The Dutch doors are built the same way as the windows, and mounted with pretty sturdy straps.
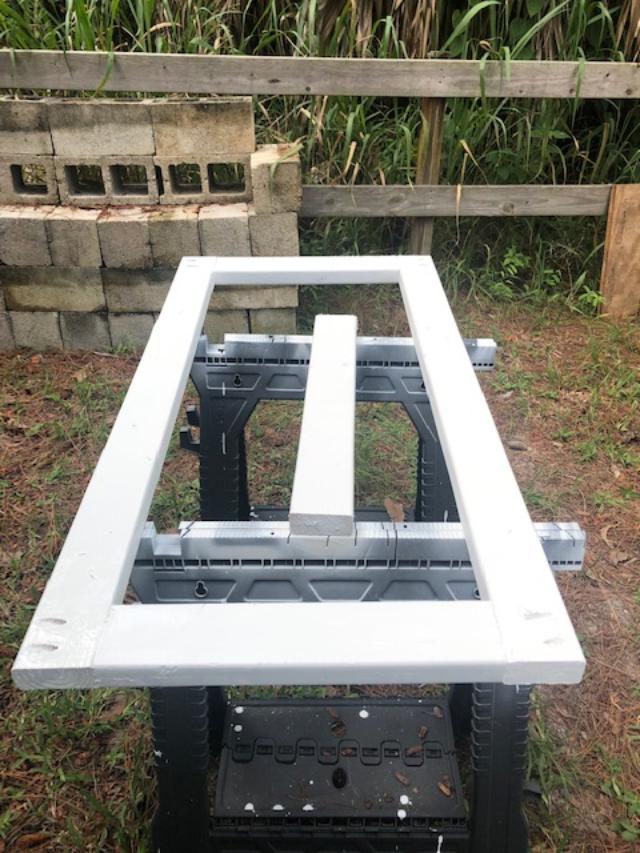
The dutch door pieces were constructed using the Kreg Jig. I built and painted them prior to putting on the hardware cloth and mounting them.
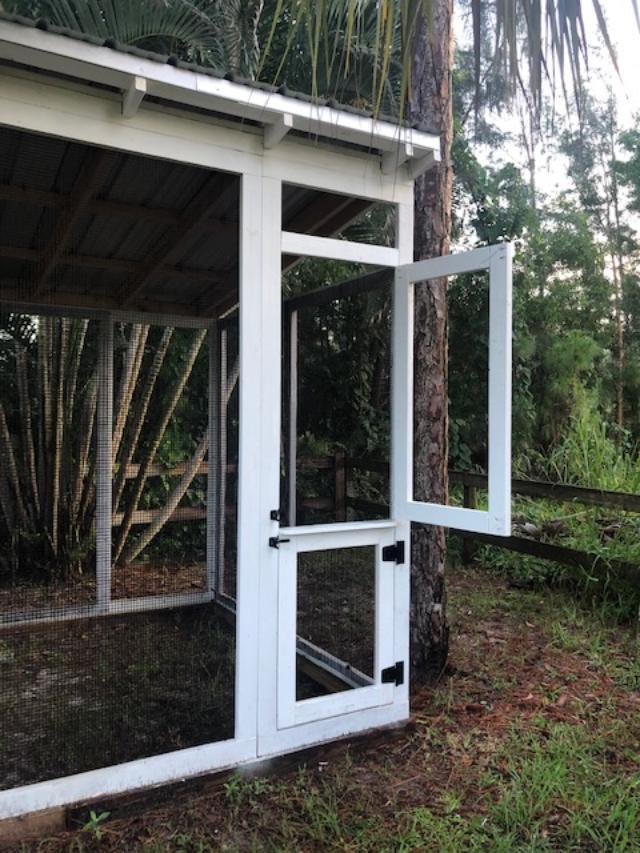
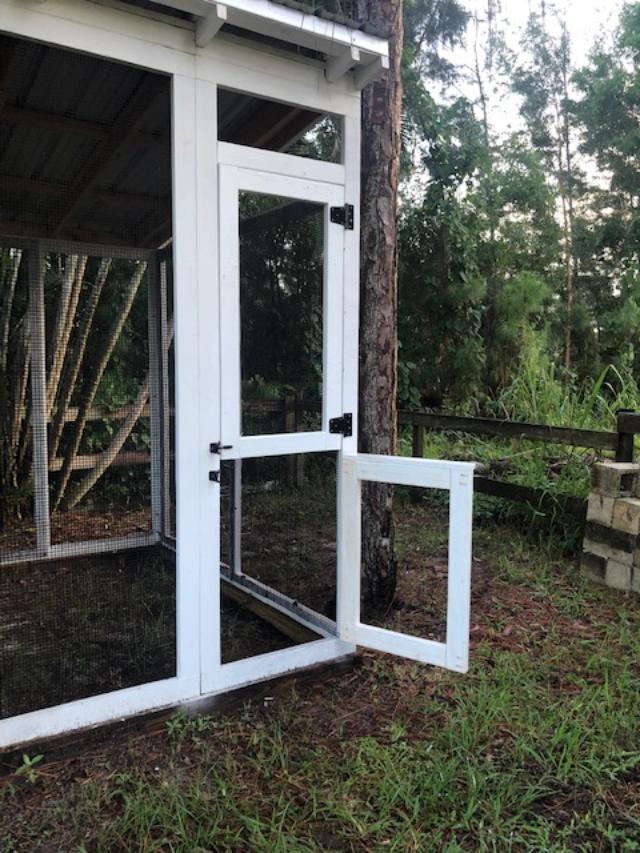
Bottom Door open
I decided to do this kind of setup for several reasons:
- I can open the top door and throw in scratch and scraps without warring about the girls getting out.
- I can open the bottom door and let them free range if desired.
- I though it looked really cool
I discovered one problem with this kind of setup. When I go into the run, I open the door, head inside, and close the door behind me. I don’t want the girls to get out. So, when inside, I clean up, or whatever. Then when I go to leave, discover the latch on the outside is not accessible and cannot get out. To make sure I won’t get locked in, I drilled a small hole in the coop and ran a string through the wall to the latch. This way, I can pull it from the inside and it will unlock and let me out.
Hurricane Straps
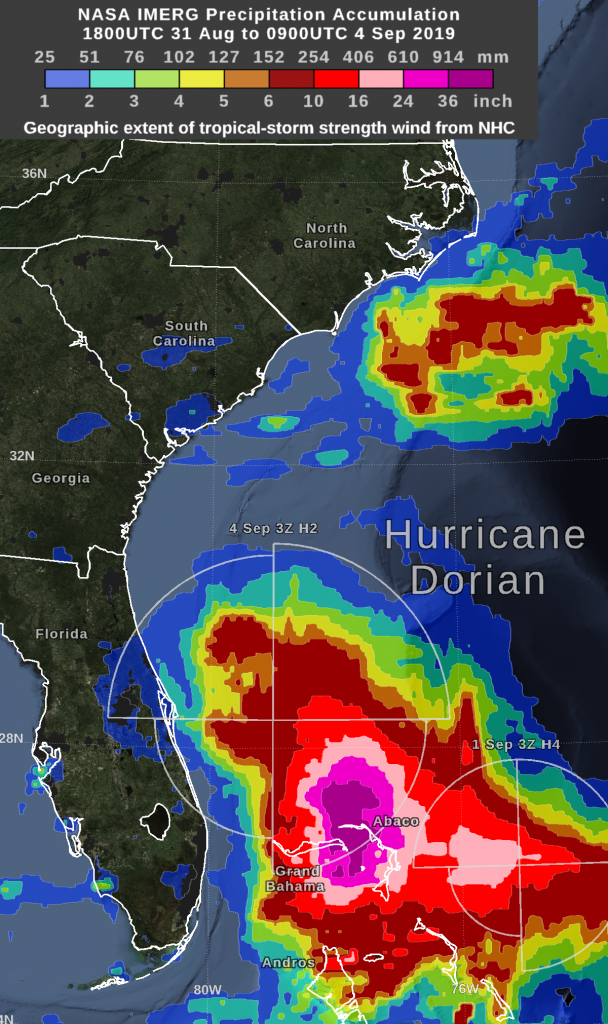
Well, the fact is I live in South Florida, and this year, we had a scare with hurricane Dorian which devastated the Bahamas. We’ve had close calls with category 5 hurricanes for the last few years. They will continue to come our way. It is just a fact of life and part of living here.
A hurricane strap is a simple piece of metal nailed to the roof rafters and the base structure. This will keep the roof from blowing off (in most cases). The picture below shows the straps installed between the roof and the walls.
The reality is that if this particular hurricane hit us, this structure would be lifted and possibly destroyed. Remember, it has no concrete footing and is a “floating” structure. There is no foundation.
All we can do is hope this kind of storm does not hit us. We can be as prepared as possible – we can board up the doors, windows, etc.
As for the coop, the run, and the structure, it may not hold up to the worst of what mother nature can throw at us, but it can certainly handle tropical force winds (this is what we got this time) and tons of rain.
I am very confident that it is certainly safe enough to keep the chickens out of harms way – whether it be predators, or winds.
The next part of this blog will discuss the automations added – specifically the feeders, the automatic door, the rain collection system and automatic chicken watering system. Stay tuned.