
The Red Pump House – An evolving vision of a shed
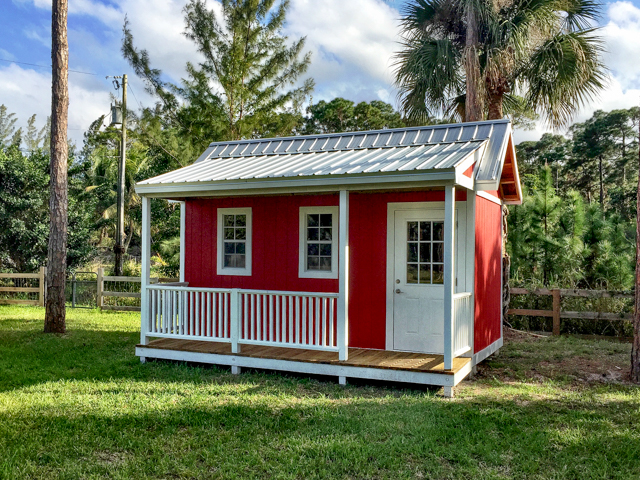
This is not your ordinary shed!
Everyone knows how to build a basic shed so I am not going to bore you with detailed instructions on how to build one. However, my motivation for this little out building and therefore what I ultimately built is a bit unique. My original vision was to have just a little shed to house an irrigation pump and sprinkler timing system. Although that is what it ultimately will house, the building itself has evolved over time. I have added some features which most backyard sheds don’t have. I will touch on those enhancements below and share how my vision grew into the Red Pump House (aka “Mason’s Playhouse”).
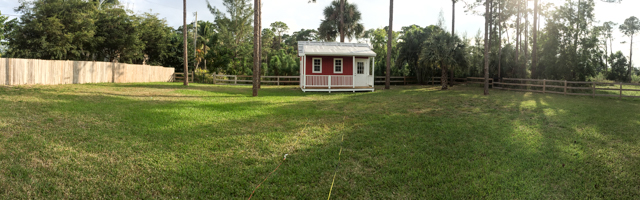
Wide angle view of the new pump house at the back of the Homestead. This image was taken with my smartphone – just to show where it sits. The roof wasn’t completed yet.
Why I built it:
There is a very real reason why I wanted to build a shed on this property. Having close to 2 acres has already created unique water requirements. As of now, only the main house on the property has city water. I plan on building raised gardens for veggies, planting citrus trees, and so on. As the property is adjacent to a county canal, I have verified that it is acceptable to pull water from it for my own irrigation purposes.
The original motivation for building the shed was to have a shelter for a pretty beefy pump and to host the irrigation system. It may also have a pressure tank for water which I might be delivering to either the house or to the chicken coop. It was logically constructed at the back of the property for the proximity to the irrigation canal. Certainly, with water coming from the canal, I will be able to save a lot of money in the future.
I am also planning on doing something with solar power in the future, so I was thinking I should have a place to house the batteries and so on. That, however, is a different topic and will be covered separately.
Where the material came from:
Like all frugal homesteaders, I frequent Craigslist regularly. I look for different items like fence tear downs, remodeling projects, etc. I don’t have to tell you that there is a ton of materials out there for the taking. Just be careful!
The original shed
About 6 months ago, I came across a CL post for a listing of “My shed needs to come down. You do the work and you can have the material.” I see stuff like this all the time.
Well, I called the guy right away. I was expecting to hear that it was an old piece of crap or already gone. Honestly, I really didn’t care if it was old or crappy, as long as it wasn’t rotted or termite infested. I just wanted the wood for my own projects.
He shared that he was attempting to move and wanted to rent his existing home. He explained that the county inspectors came by and told him that the shed he had in his yard was too close to his property line. It was against city limit setback ordinances. They told him that he must either move it 5 feet away from the property line or remove it completely. He sounded very sincere albeit a bit frustrated and was a genuinely nice guy. He explained to me that he wanted to “meet” me before he allowed anyone in his yard with a truck and power tools.
Original roof gone. Coming down!
So, After speaking with him for a while on the phone and explaining why I wanted it, he was happy to meet me. I told him I had a pickup truck and tools and offered to remove it and haul it away. The next day, I went over to his property to see it in person. I was absolutely thrilled to find an 8×12 shed which he built only 2 years earlier from a kit.
I spent that weekend completely disassembling the shed and taking the materials home with me. It took a total of 5 pickup loads in total. All of the material was piled behind my barn and covered with a tarp. Fortunately, his home was only 15 miles from my homestead. During the disassembly, I discovered that although it was built from a kit, it was a shoddy build (at best). The door was broken so it went into the trash. There was a composite shingle roof which I disposed of. His foundation was built using 2×4’s and
Original shed disassembled.
was not very sturdy. There were no hurricane straps used anywhere and if I pushed hard, the whole structure would probably fall over.
I was first thinking I would take the walls home as is, and rebuild the shed quickly. That thought was quickly shattered when I discovered that the walls themselves were not square and the screws he used were very short. So, I totally disassembled the shed into each 2×4 and brought them all home.
The Build Site and New Construction
Materials and Cost:
After taking an assessment of the materials I had collected over the previous few months, I decided that I would build a shed with a base of 8×16 feet instead of the original 8×12. One Craigslist find allowed me to gather enough 2×6’s for the whole foundation. Another CL find gave me wood from an old pier which they were replacing with composite materials. I’ll use that for the porch. A third CL ad produced enough plywood sheathing for the roof and floor. The original shed tear down gave me most of the wall boards, sheathing, 2×4’s and almost all of the roof joists. As I made it larger, I needed more than the shed came with. In all, I think I spent about $150.00 on parts from Home Depot. These included new screws, hurricane hangers, some 1/4’s for the fascia boards and some paint. I even managed to save money on the red paint, as someone returned it to Home Depot as a wrong color. The 5 gallon bucket cost me $12.00. The only other additional necessary costs were two small windows and a door from a local home charity stoor and metal roof materials which I purchased from a friend who owns a roofing business. In total, this building (as it sits today) cost me about $700.00 and lots of time.
Construction Details:
Winters in South Florida are awesome for outdoor projects. There is not much rain or humidity and lower temperatures are the best. So, I started this build around Thanksgiving time. I spent several long weekends getting this to what it looks like in these photos. Yes, there is still much more to do (gable end flashing, a weather vane and interior finish), but as far as I am concerned, the basic build is just about completed.
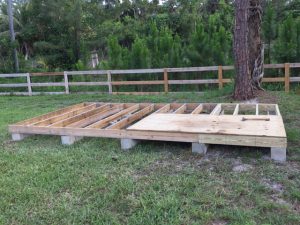
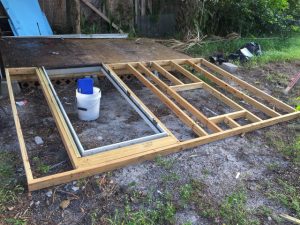
The new building foundation.
I started with the foundation (of course). I leveled the ground and used concrete blocks on top of pea gravel for the base. I have a pallet of old concrete blocks from some old construction so that worked out well. I know we need only a few blocks for a normal shed base, but I spaced them closer for more stability. They sit evenly spaced at 2 feet across under the floor joists. Using 2×6 construction with basic joist hangers and screws, that was easy enough.
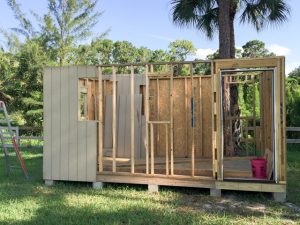
Basic walls and sheathing
Then, the next weekend, I added the remaining floor plywood and built the walls.
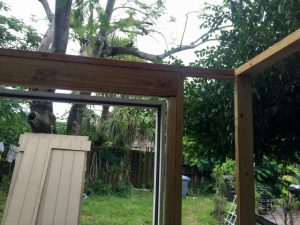
Normally, I’d have a formal framing plan, but didn’t this time. I knew what I wanted in my mind’s-eye. Since I was using the healthiest (and straightest) wood I had collected, I was just inventing it as I went along.

Mostly built structure.
During the week, I spent a little time scouring home stores for inexpensive windows and front door. I found some online, but decided to invest $50 bucks at the local Habitat for Humanity of West Palm Beach store. It is always nice to give back, and this is a good way to get quality recycled materials.
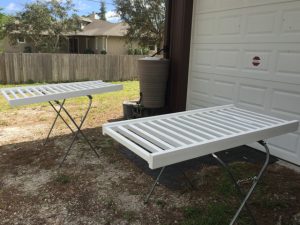
Priming and painting the railing.
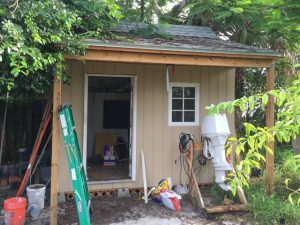
That said, I didn’t know exactly where the windows and door would go until I built the walls. Then, I completed the roof trusses and basic porch structure.
The barn door on the side was tricky also. I wound up building two smaller doors using 2×4 framing. I modeled the doors from an old Tuff Shed I had built while living in Colorado. I don’t care that much about security as this is on the back of my property, however, I wanted it to be sturdy enough to lock. After looking online for all door hardware, I wound up calling Tuff Shed directly to purchase a lock set. Their patented design was much more sturdy than anything I could find on Amazon or at the box stores. they were happy to sell me a set directly for less then $50.00.
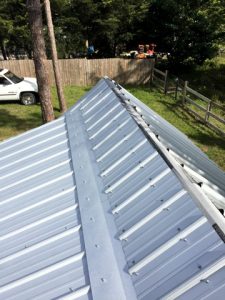
Metal roof top before ridge cap
Since I had collected enough wood for a porch, I decided to build a frame for a deck and enclose it with a nice railing. As for the porch itself, I overbuilt it. I decided to put two concrete tubes in the ground to support he front of it. Then built the framing and bolted it to the structure (the same way you would on a normal house). From Craigslist, I managed to find a bunch of 2×2’s so I cut them and made some cute railings. I primed and painted them before installing them.
The metal roof was tricky. I had never installed a metal roof before so I did a lot of research online. After watching countless videos and reading information from manufacturers, I found an awesome Metal Roof Installation Video . I know, I’m an engineer and want to build everything to code. Even this building. I installed my roof using the same method as what was in the video. Of course, my roof had a valley transition and multiple pitches making it much more complicated, but the idea was about the same.
Mason’s Playhouse
You may be wondering why it is called Mason’s Playhouse. Well, while I was constructing the porch, Danielle (my step-daughter) and my 4 year old grandson Mason came back to see what I was up to. It was a nice break and during their visit Mason blurted out “Thank you for building me a playhouse!” It was so cute. I have no idea where this idea came from in his little head, but I just smiled. Ever since that time, the pump house has been known as his playhouse.
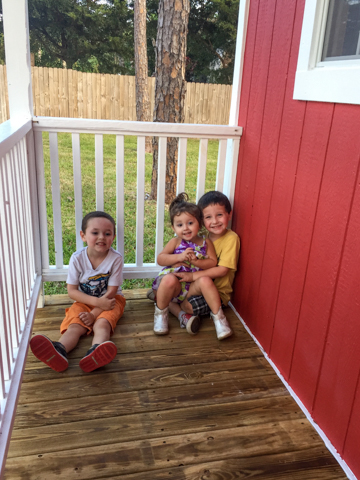
Three of my beautiful grand kids… Mason, Cameron and Cayden hanging out at “Mason’s Clubhouse”
I have a lot of ideas of what I want to do inside to make it fun for them. For now, this is what I have. As I move forward with the weather vane, the interior and other fun stuff surround this pump house, I’ll create new posts.